Introduction[]
If you've forged your washers, you need to either punch or drill the holes to the rim of the washer. The Romans probably punched the holes while the washer rim was hot, but modern drill bits make drilling a good alternative. In either case, using a template ensures that holes are
- At regular intervals (e.g. 45 or 60 degrees apart)
- At the equal distance from the center of the washer
Making the template is fairly time-consuming, but in retrospect, the process described below is probably too complicated. You can save time in two ways:
- Make a steel template
- Make the template from thick plywood (~20mm), which should work well enough for the 4 holes and 20 starter holes you need to drill.
- Instead of making small steel pieces and chiseling slots for them, use pieces from a small steel pipe with appropriate inner diameter.
Also, a template made from fairly thick (2-3mm) steel is more durable than a wooden one, and somewhat simpler to make, as separate metal reinforcements are not required.
Making washer rim hole template[]
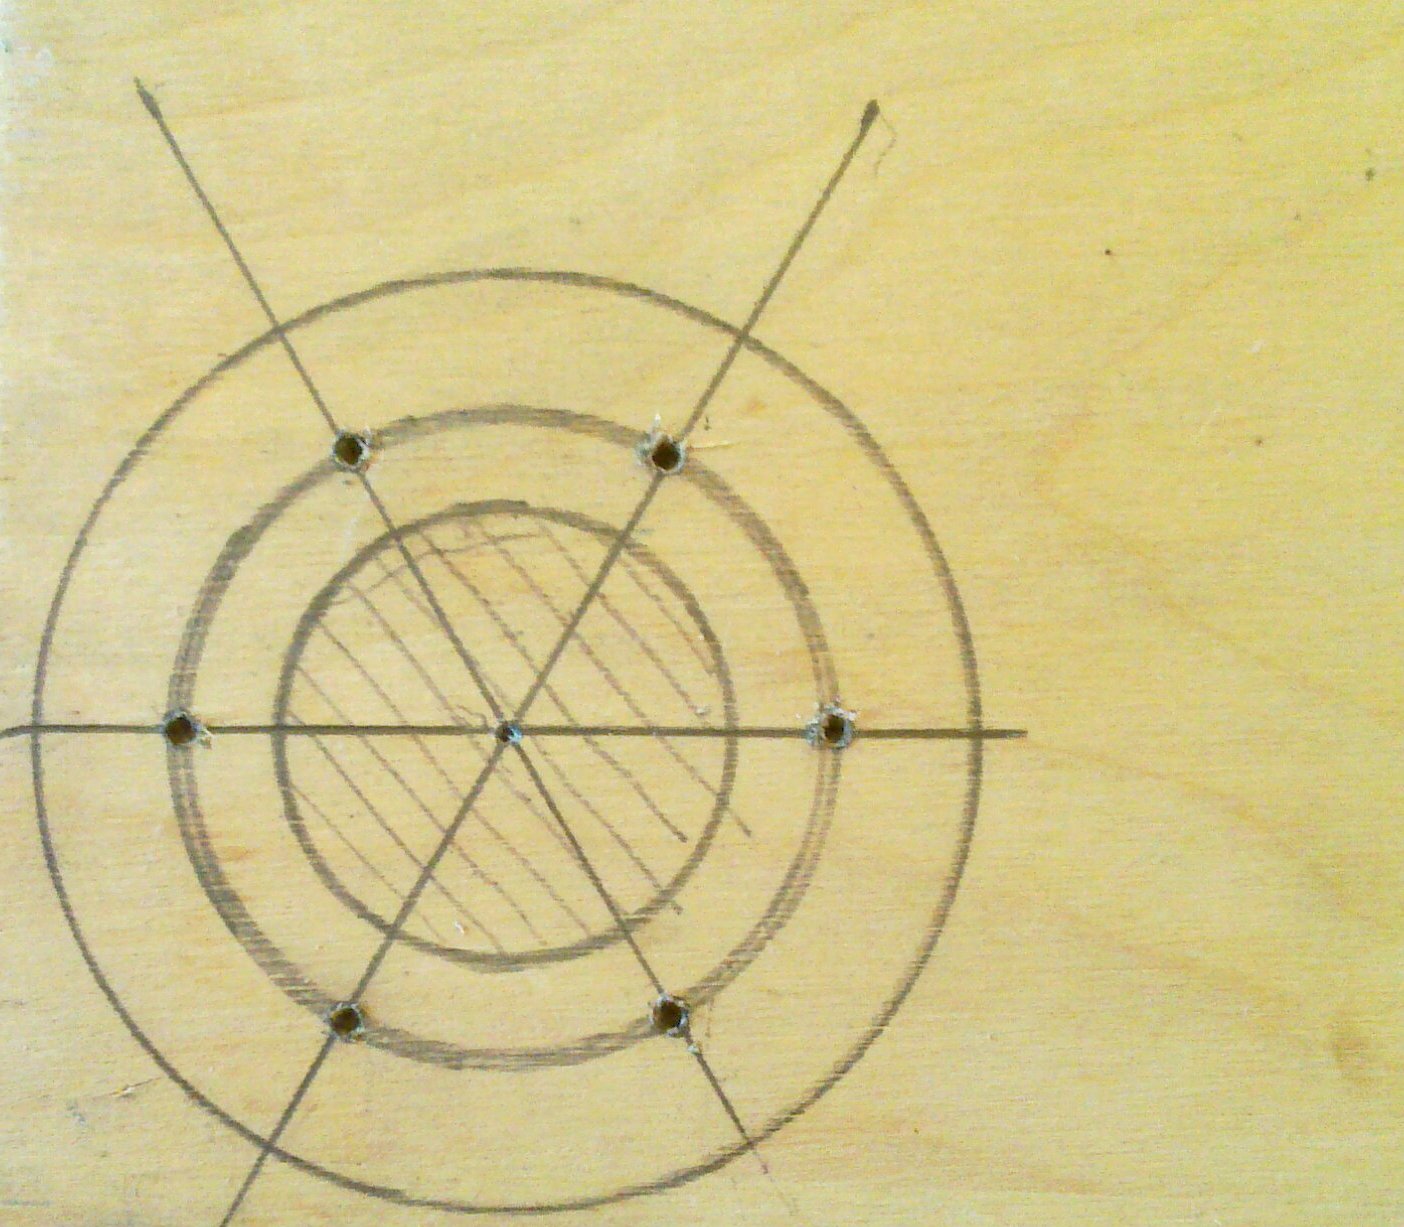
This method produces a plywood template that can be used to drill the holes and is not suitable for punching. Use a pair of compasses to mark three concentric circles and three lines at 60 degree angle:
Alternatively print out a 1:1 model of the template from a CAD program and glue it to the plywood.
Counting from the center outwards, these circles mark
- The washer core
- Washer rim holes
- Edge of the washer rim:
The intersection of the three lines and circle #2 is where we drill the washer rim holes.
Next drill the center hole with drill bit for steel, starting with a small one and increasing the drill diameter progressively. This ensures that the hole is exactly in the center. Finish the job with your hole-cutting drill bit:

Next adjust the hole-cutting drill bit so that it cuts along circle #1:


Once the hole-cutting drill bit is correctly configured, drill the hole for the washer core:

Now test the hole with all of your washers. If necessary, rasp or file the hole larger while maintaining a tight fit:


Next drill the holes for the washer rim holes along circle #2:

Reinforcing the template holes with small steel pieces[]
This step might not be necessary, especially if you use fairly thick (e.g. 20mm) plywood. In any case, the idea is to reduce the wear of the plywood, which could result in holes drilled last to be aligned badly.
Start by marking the edges of the steel pieces (6 in total) and drilling a hole to each. The holes should be the same diameter as those in the plywood template:

Once the pieces are ready, take one, push a pin through it and the plywood template and align them as you see fit. Continue by marking the outline of the piece onto the plywood template:


Chisel a small slot to the plywood to accommodate the steel piece:


Repeat this process for each piece:

Unless your chisel work was superb, you then need to glue the pieces to their slots to keep them rigid:


Drilling washer rim holes[]
Once the template is ready, we can get to business. Place a washer into the template from the underside, so that the washer core can be easily attached to a vise. Align the washer so that the washer bar will not block any of the washer rim holes:


Attach the washer core to the vise and drill one hole through the washer rim, making sure the template does not rotate:

Push a L-shaped pin through the just drilled hole to help keep the template rigid.
Continue by drilling shallow starter holes for the remaining holes:

Once the starter holes are ready, remove the template entirely and drill the remaining washer holes:

